-
 Help Center >
Artist: LiveStream Setup Help
Help Center >
Artist: LiveStream Setup Help
LiveStream: With a Pre Recorded Performance
How to Add a Pre-Recorded Video to Livestream
Start off by opening up your OBS program (if you do not already have OBS installed you can head to this help article for full info on that.
(NOTE: If you don’t want a thumbnail image for your performance you can skip down to VIDEO SETUP.)
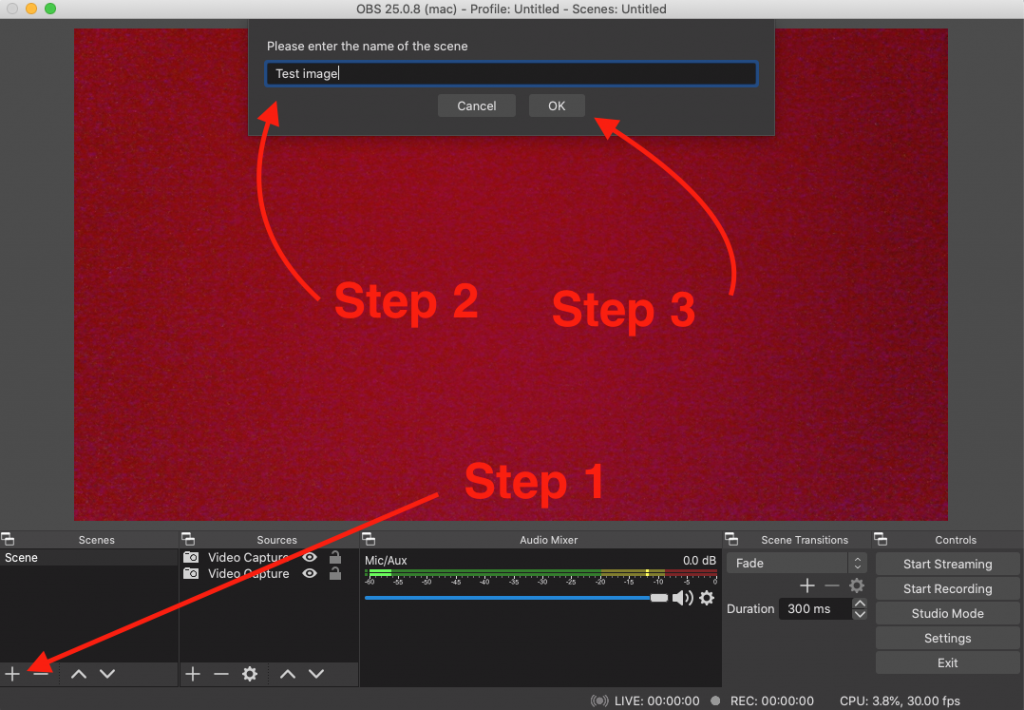
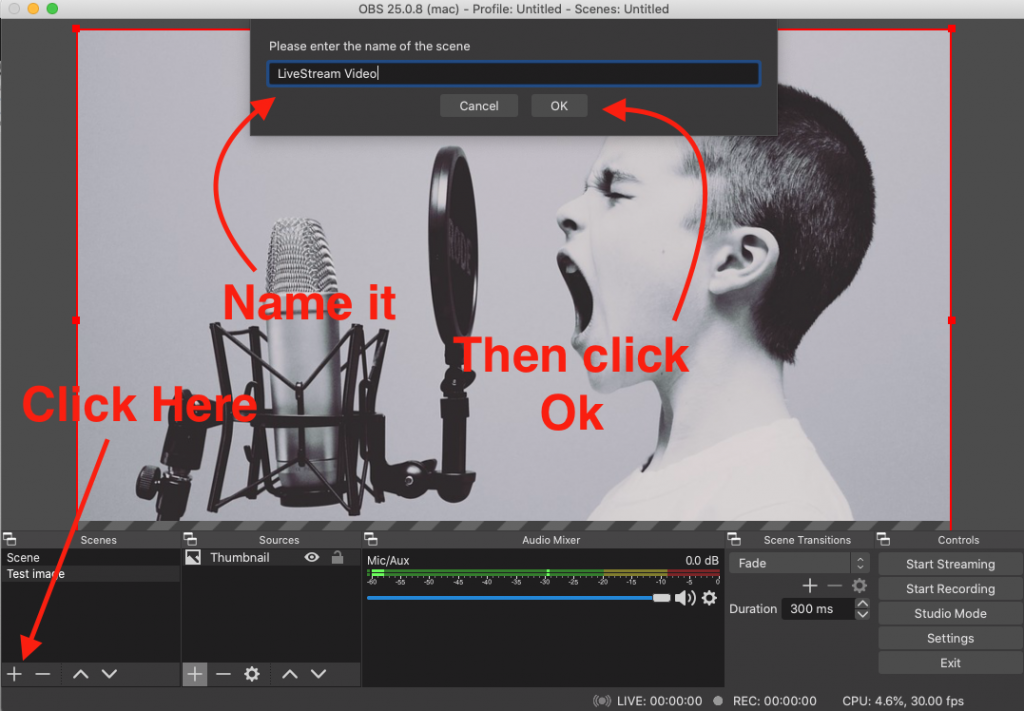
Then you will need to click on the + button on the bottom left under Scenes. It will then give you the option to name your image. Once you do that you just need to hit Ok.
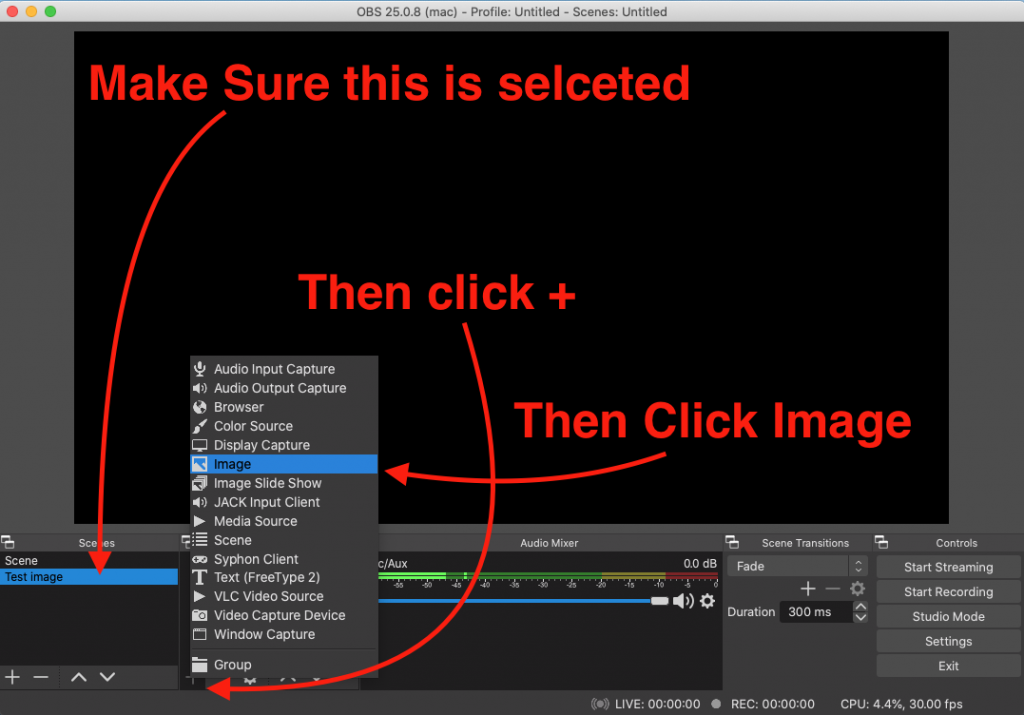
Then you will need to make sure that image is selected and then hit the + button in the Sources box to the right of that and click on Image.
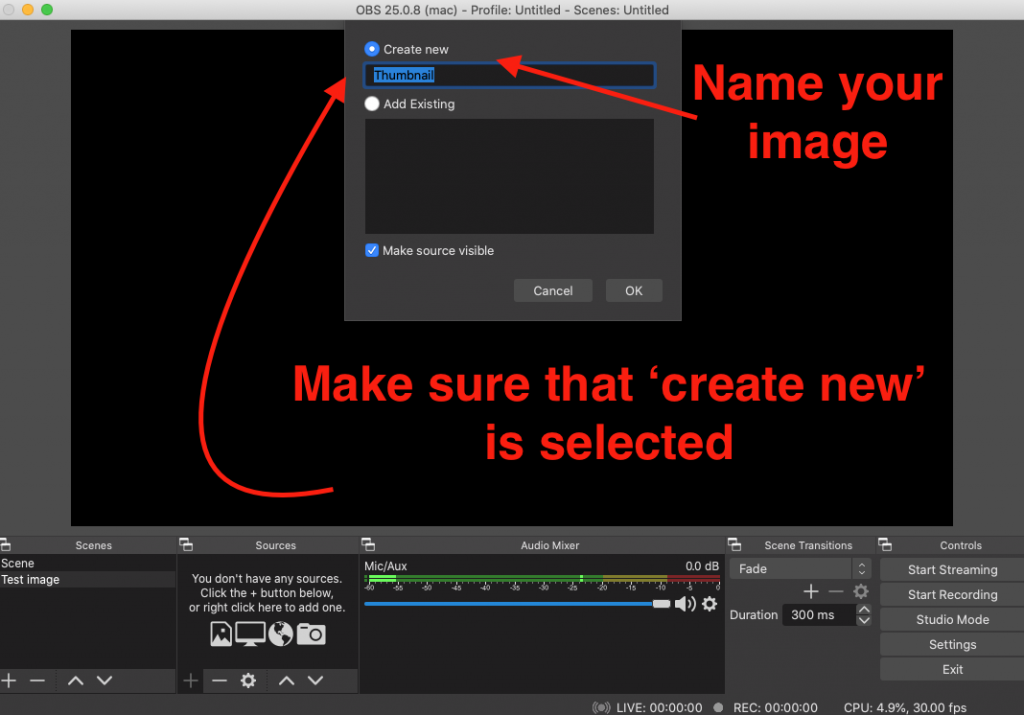
Then you will need to make sure that Create New is selected and that your image is named. Then click Ok.
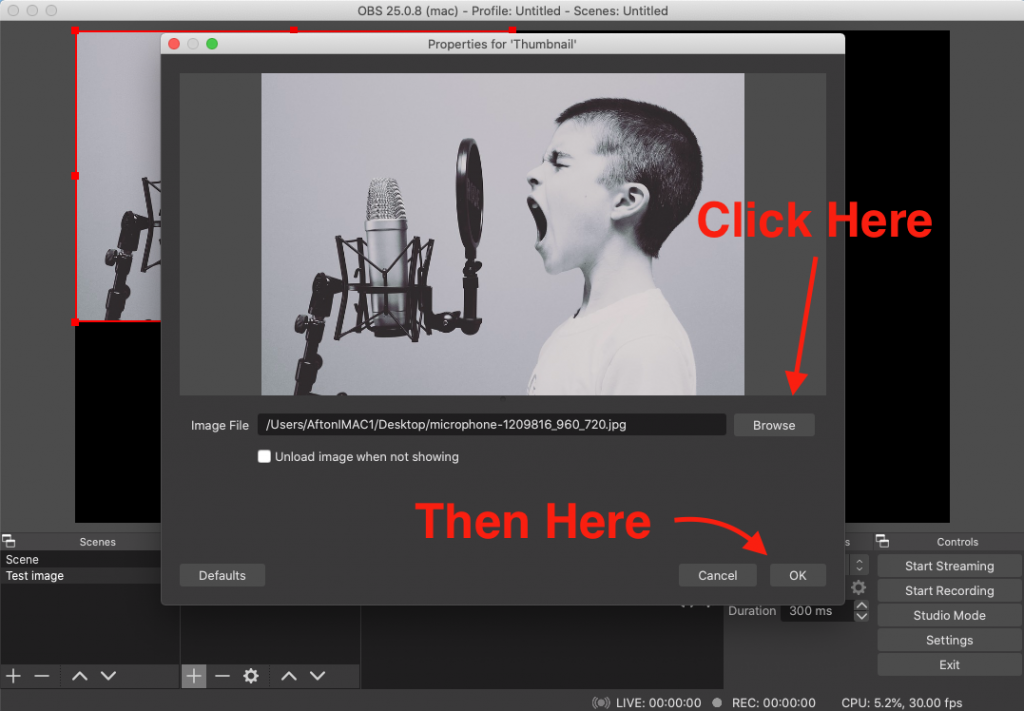
Next you will need to click on Browse to find the image that you would like to use and then click Ok.
Video Setup
Starting off you will just click on the + button in the bottom left corner under Scenes. Then you will need to name the file and hit Okay.
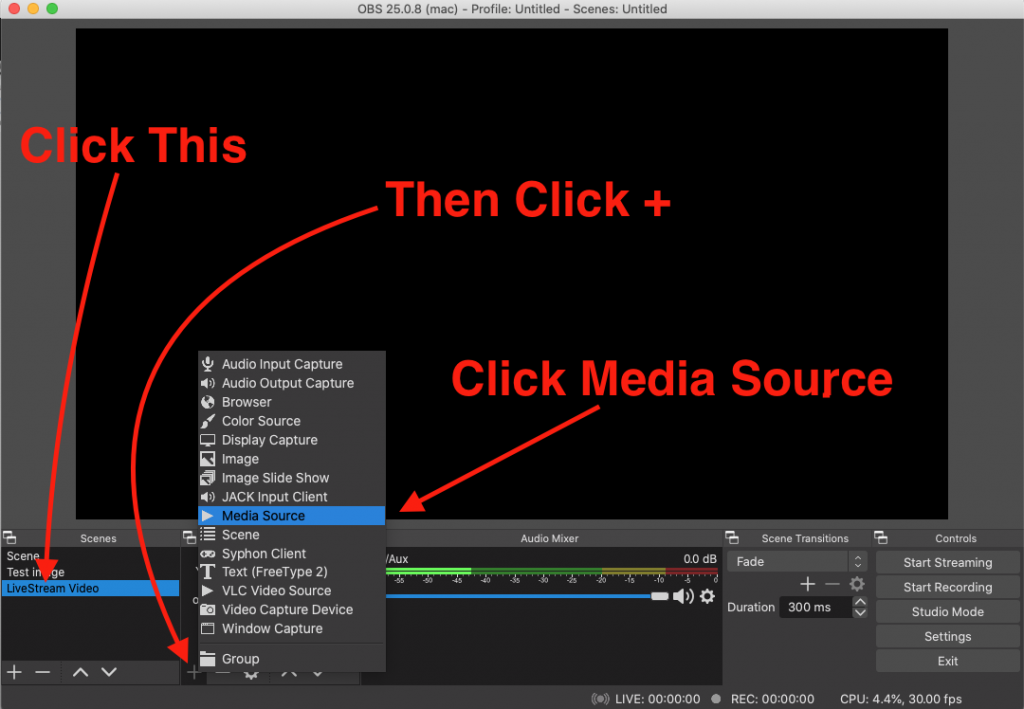
Next you will need to make sure that you have your Scene selected (in this case mine is called ‘LiveStream Video’. Then hit on the + button in the Sources section. Then click on Media Source.
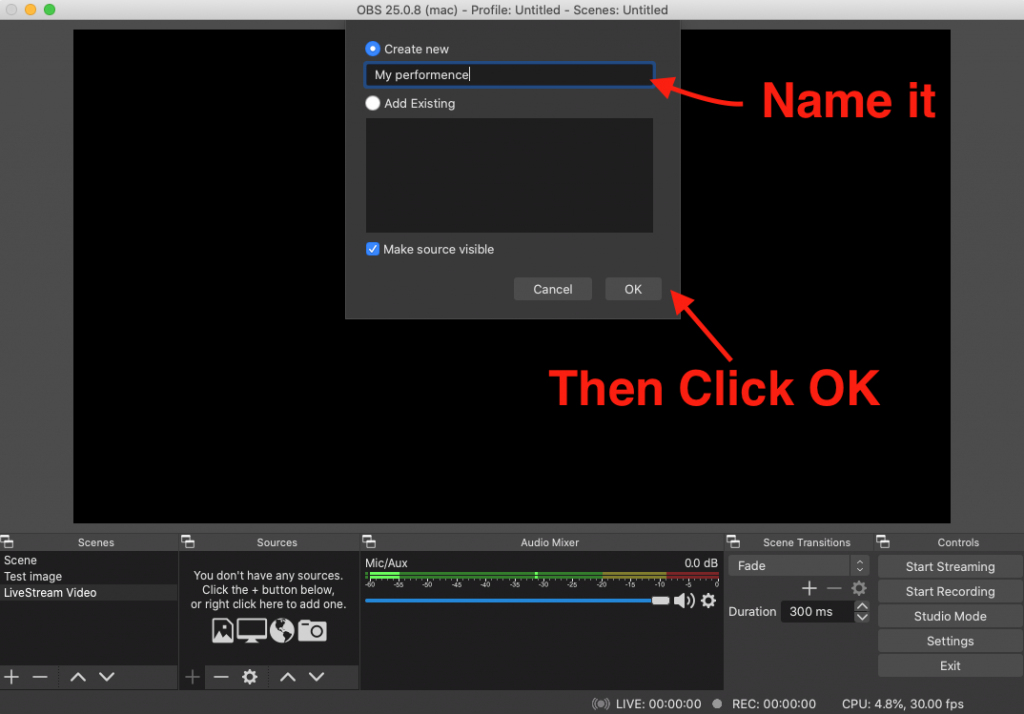
Then you just need to name the file and click Ok.
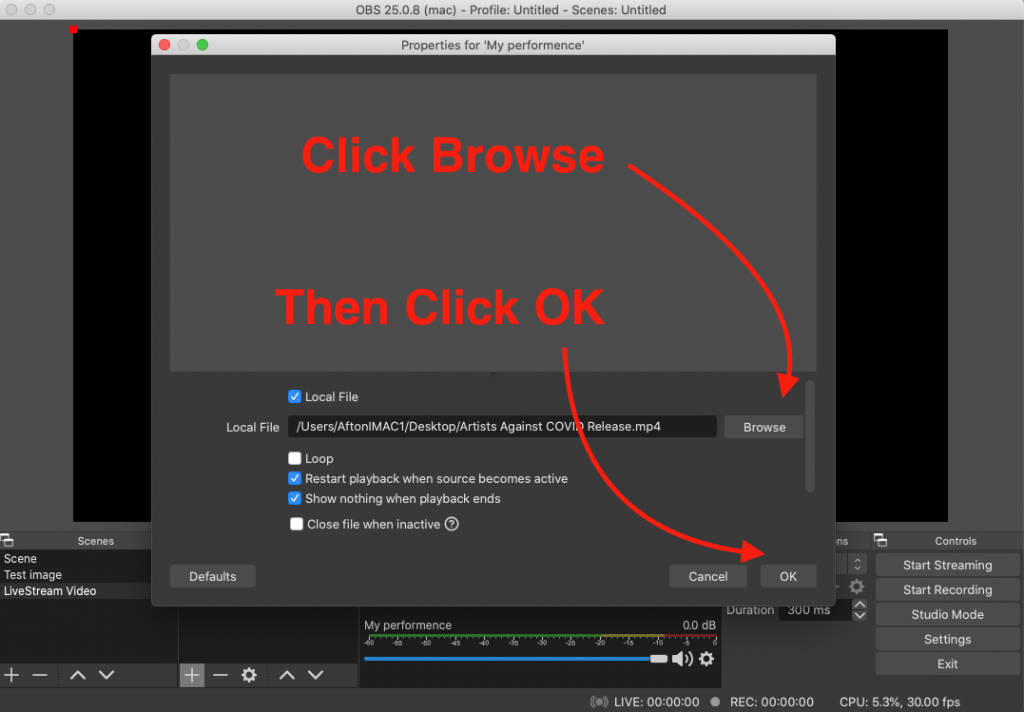
Next you will need click on Browse and locate the pre recorded video that you want to be played on your LiveStream. Once you find it just hit Ok.
Finally you will just need to click on the Video Scene in order for it to play. In this case mine is called ‘Livestream Video’. Once you click that the video will start. So once you have your livestream all setup and streaming you would just click on the video file for it to begin playing for your audience.

Video Tutorial
You can also watch the below video to walk you through the process. Skip to 2:10 in the video for the start of the tutorial.
Categories
- Artist Payment
- Artist: LiveStream Setup Help
- Fan: LiveStream Setup Help
- General Show Terms & Details
- How Afton Promotes
- How To Sign Up For An Afton Account
- How to Use Promo Codes
- MyAfton Design Tool
- MyAfton Platform: Account Help
- Not Getting Our Emails?
- Open Dates & Days of Week
- Perks
- Refund Policy
- Ticket Questions
- Time Slot Policy & Set Lengths
- Turning Booking On/Off
- Weekly Check Ins
- Weekly Goals for Confirmed Bands