How to Sign Up To MyAfton
Setting up an MyAfton Account is pretty straight forward. But in case you’re having trouble signing up, here is a 10-step, screen-by-screen set up tutorial of a new account, from start to finish.
You can sign up on any device, but this tutorial is taken from the desktop/laptop site for simplicity. Mobile devices and tablets may appear slightly different, but will still work virtually the same as a desktop/laptop.
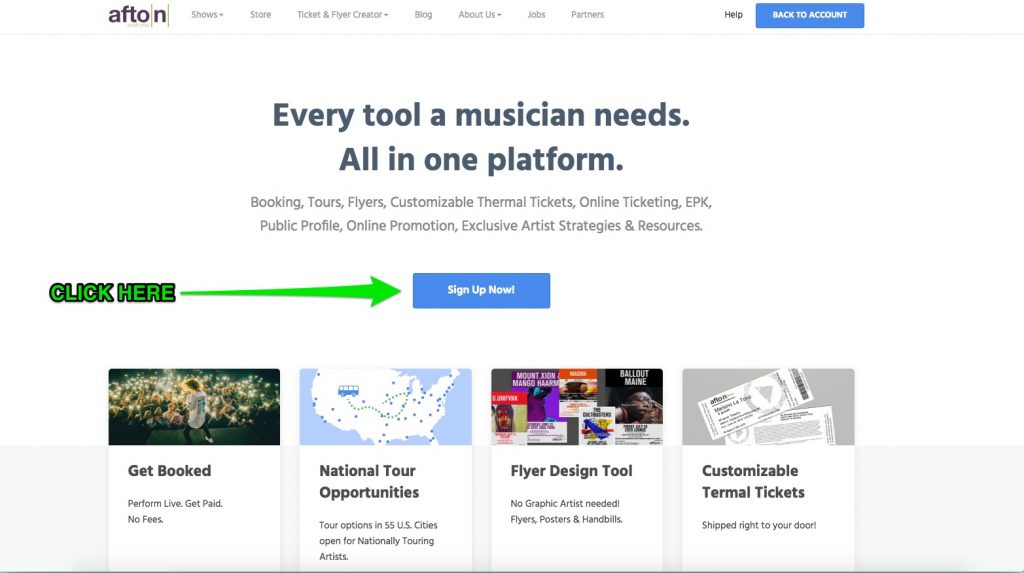
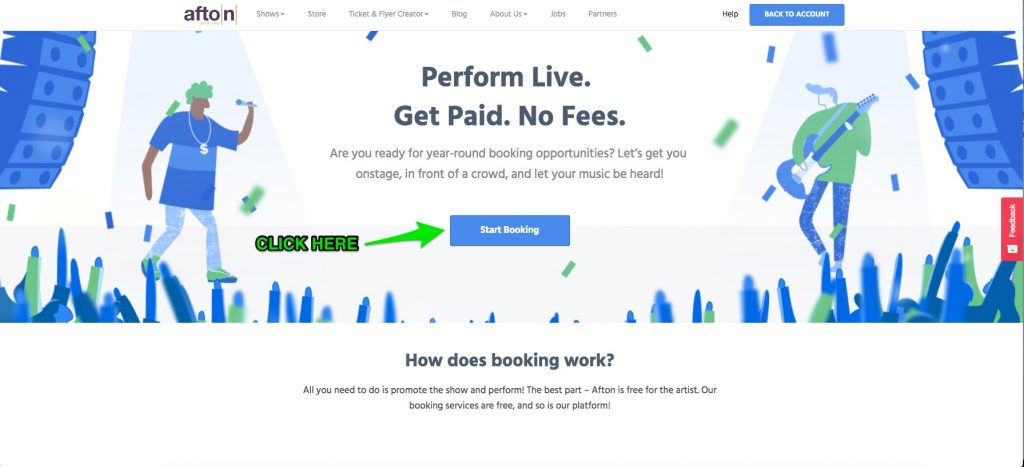
Step 1: Click the sign up now button on the main page (image 1) or the booking page (image 2 below).
Step 1 (cont’d): You can also sign up on the booking page:
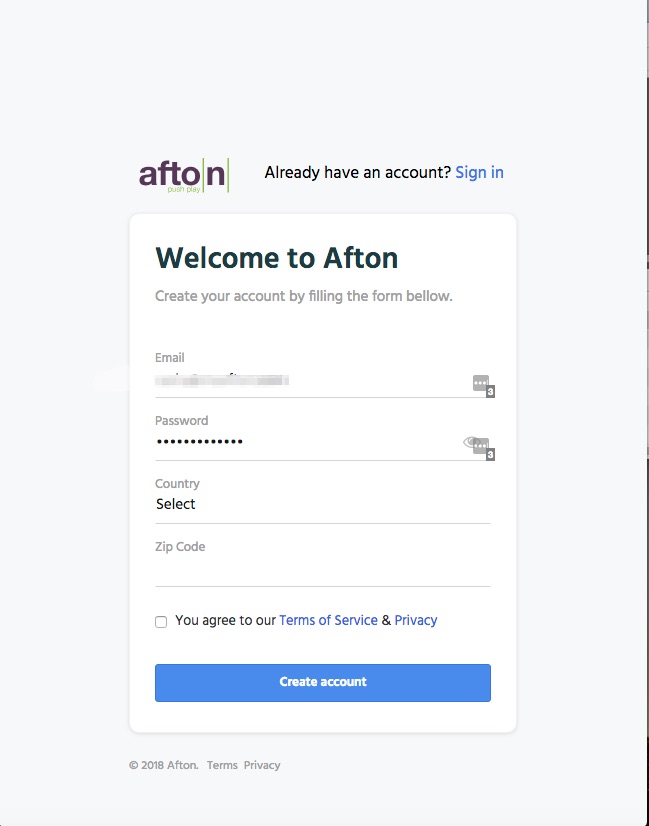
Step 2: If you do not have an MyAfton account, you will see the screen below (Image 3). Fill it out with your email, password, country and zip code. Read through the Terms of Services & Privacy and click “You agree”.
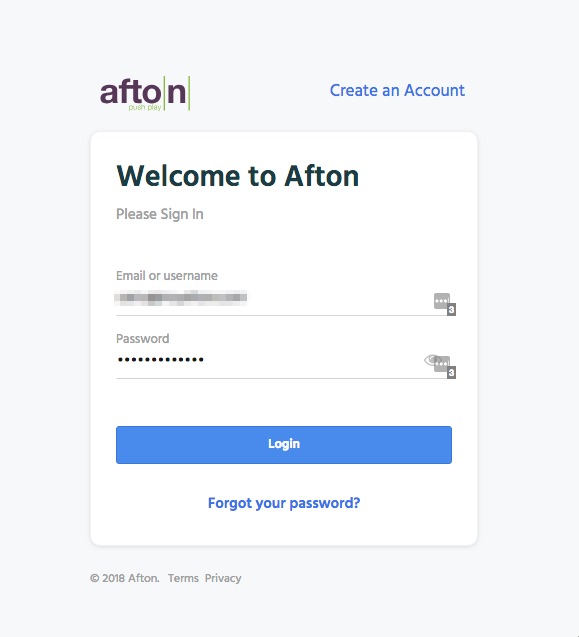
Step 2 (cont’d): If you already have a MyAfton account, you will see the screen below (Image 4). Simply type your email or username and password to go through the application process. If you don’t have an account, you can click “Create an Account” at the top of the screen. If you forgot your password, click “Forgot your password?” and follow the instructions.
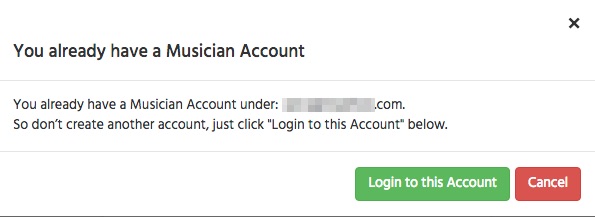
Step 2 (cont’d): If you aren’t sure if you have an account, the MyAfton sign-in portal checks with the internal database and will let you know with a warning screen that will pop up so you don’t build a new account with the same email:
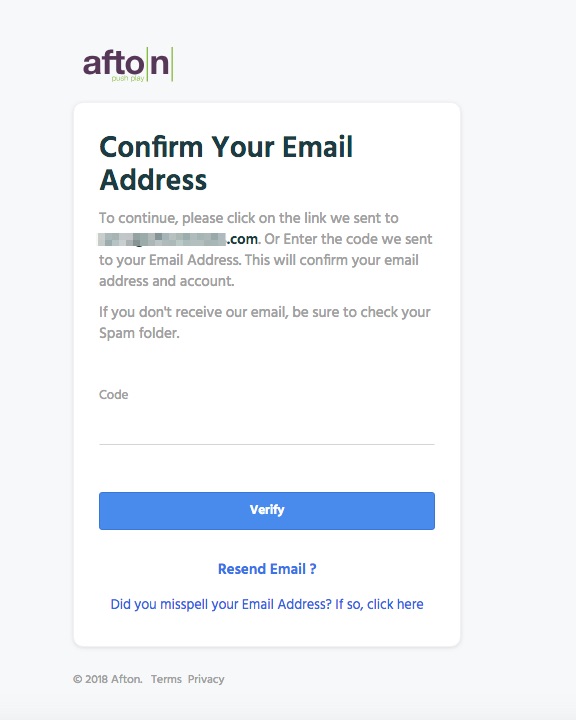
Step 3: Once you’ve signed up for an account, the next screen will ask you to confirm your email address (Image 6 below). You’ll need to go back to the email account you used to sign up and check it for the code (example in step 4). If you don’t see the confirmation email, check your spam folders and/or update folders. If you still don’t see the email, you can click “resend email” on the confirmation screen. If you accidentally spelled your email wrong, click the link on this screen to fix it.
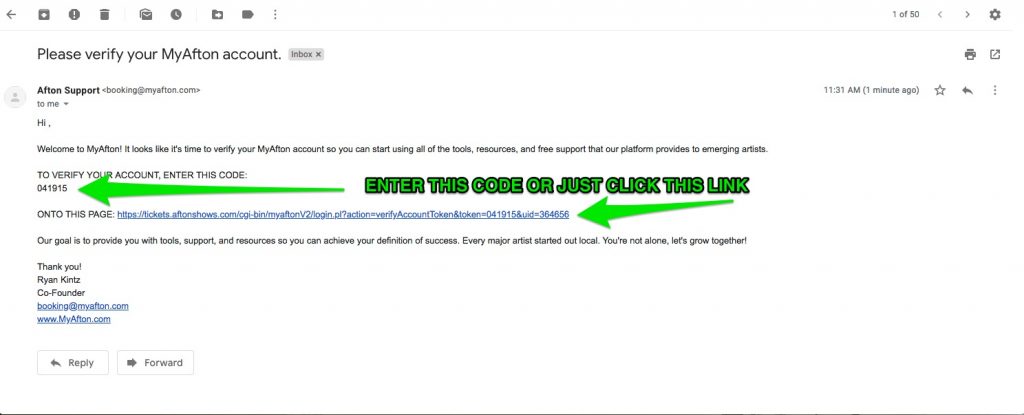
Step 4: Check your email for the confirmation/verification code (Image 7 below). There will be a code to copy and paste into the MyAfton confirmation screen (see above), or to make it easier, you can also click the link in the email and it will automatically confirm your email and send you back to the MyAfton page to continue registration.
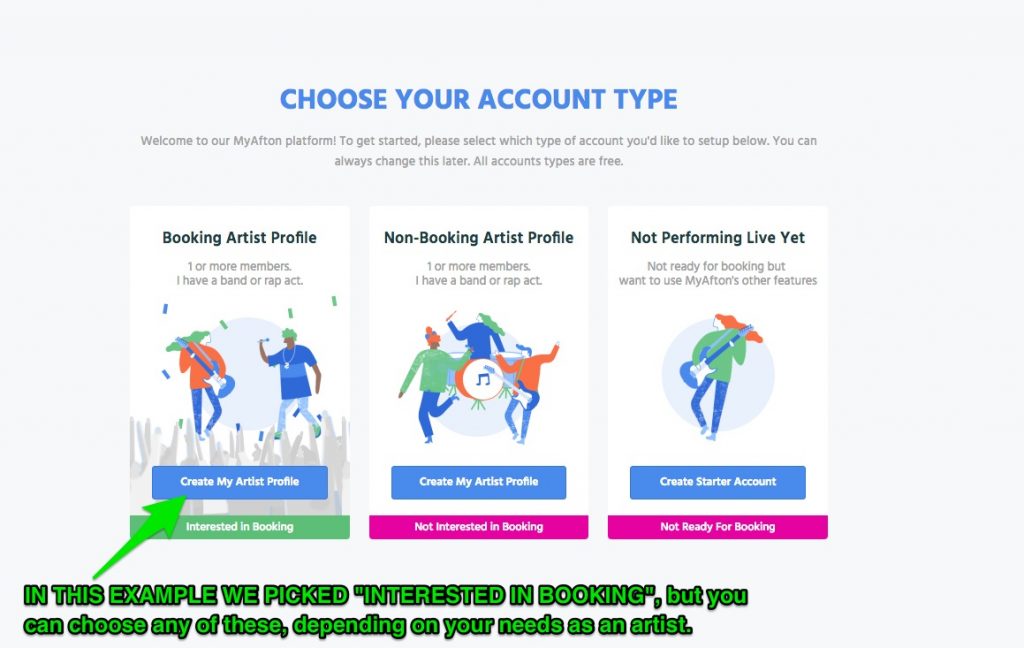
Step 5: Choose Your Account Type (Image 8 below). If you are ready to start booking shows, click the first box. This will create your artist profile AND a musician account. If you’re not ready to book and have an act or band or you’re not performing yet and want to utilize the non-booking Afton tools, choose the second box. If you’re simply a musician without an act and/or not performing live, check the third box, and you will simply create a musician account, rather than an artist profile.
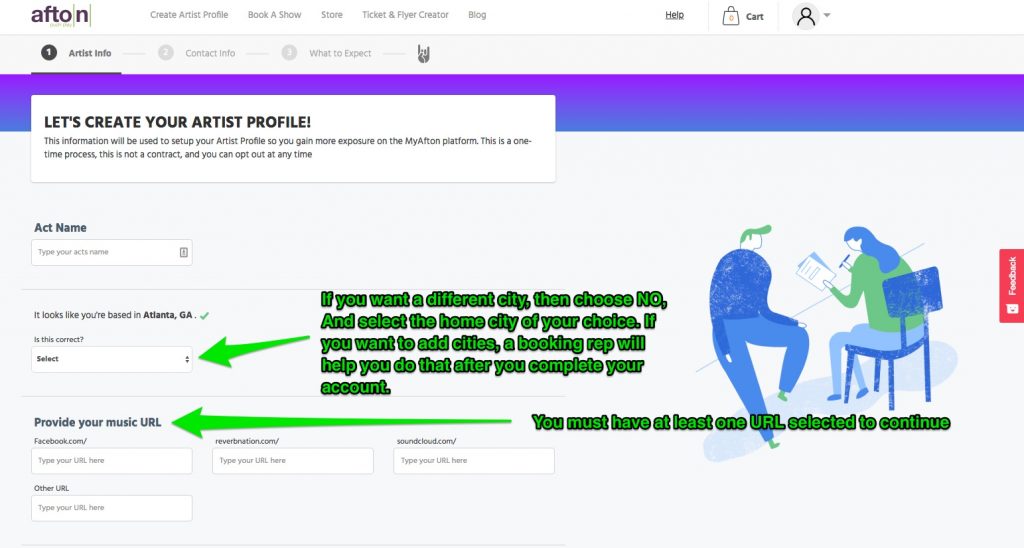
Step 6: Now we begin the process of building your Artist Profile! (Image 9 below) Here you will input your Act Name, your home city and links to your act’s music. Two things to note here: 1-You can only pick one home city here. You can change it at this step (or later in your account). If you want to add more than one city, just pick your primary city here and let your booking rep know you’d like to add more cities to perform in. 2-You must have at least one link to your music to build an account.
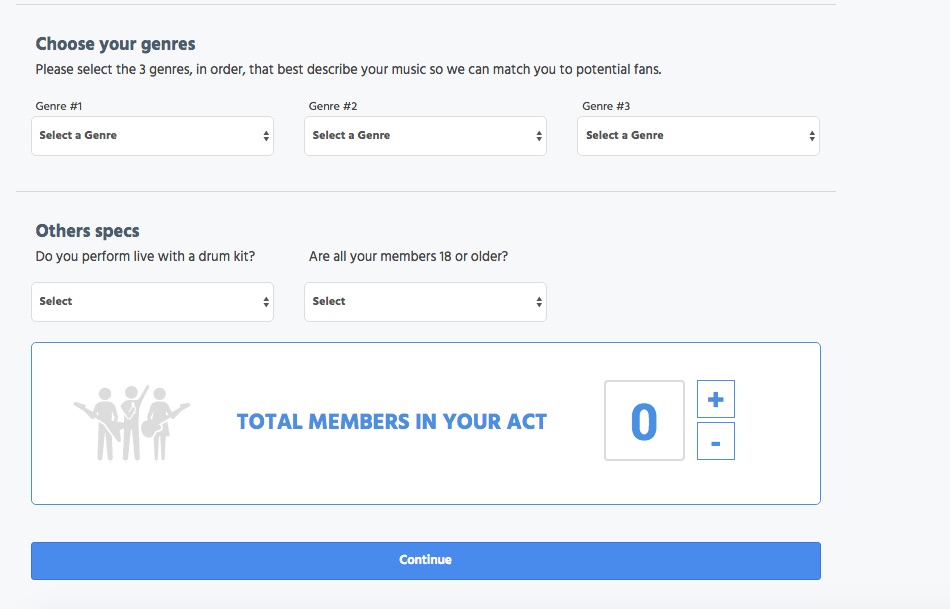
Step 6 (cont’d): Scroll down the page and you’ll be able to choose the three music genres that fit you best. These can be changed at any time in account later. We also need to know if you perform with a drum kit and member ages (as some of our shows have age restrictions like 18+ or 21+). You can also tell us if you have more than just you in the act. Once you’ve entered this information, click “Continue”.
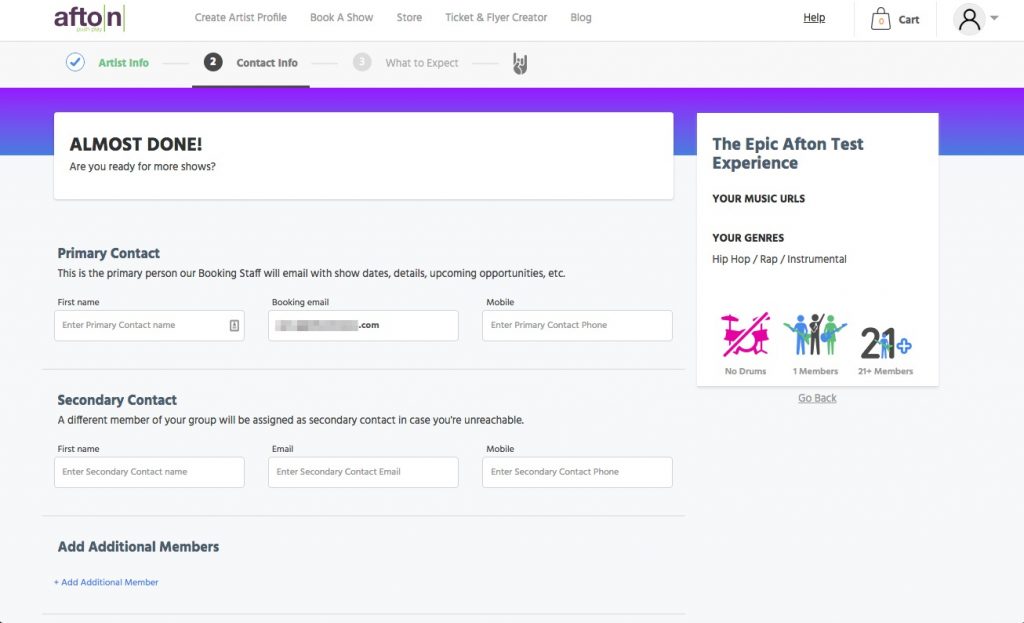
Step 7: Enter your contact information on this screen (Image 11). You can add a secondary contact and additional members. You can add these later if you don’t know this information at the time of sign up. Primary contact is most important, and will also serve as your “Musician Profile”, the root of your Artist Profile.
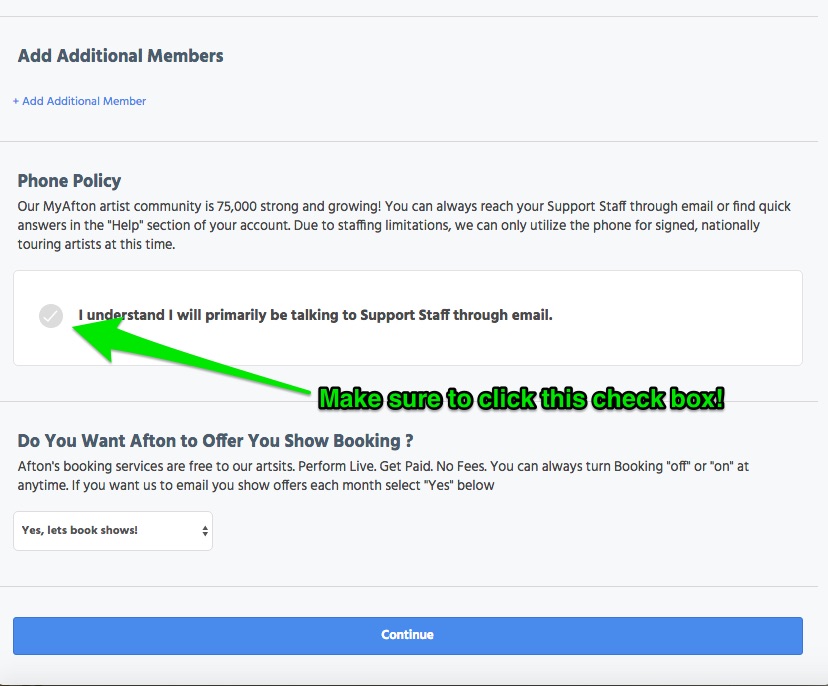
Step 7 (cont’d): Scroll down to read about our Phone Policy. (Image 12 below) Due to the volume of artists we work with, virtually all of our correspondence is via email. Check the circle next to “I understand….”. You must check this box in order to continue. You can also toggle booking on or off on this screen.
Step 8: What to Expect. Here is all the details on how MyAfton shows work and what we expect from you and what you can expect from us. You must select “Yes” to continue with booking. If you select “No” we will not be able to book shows for you. Note: WE ARE NOT PAY TO PLAY. Artists do not pay any money up front to perform at an Afton Show.
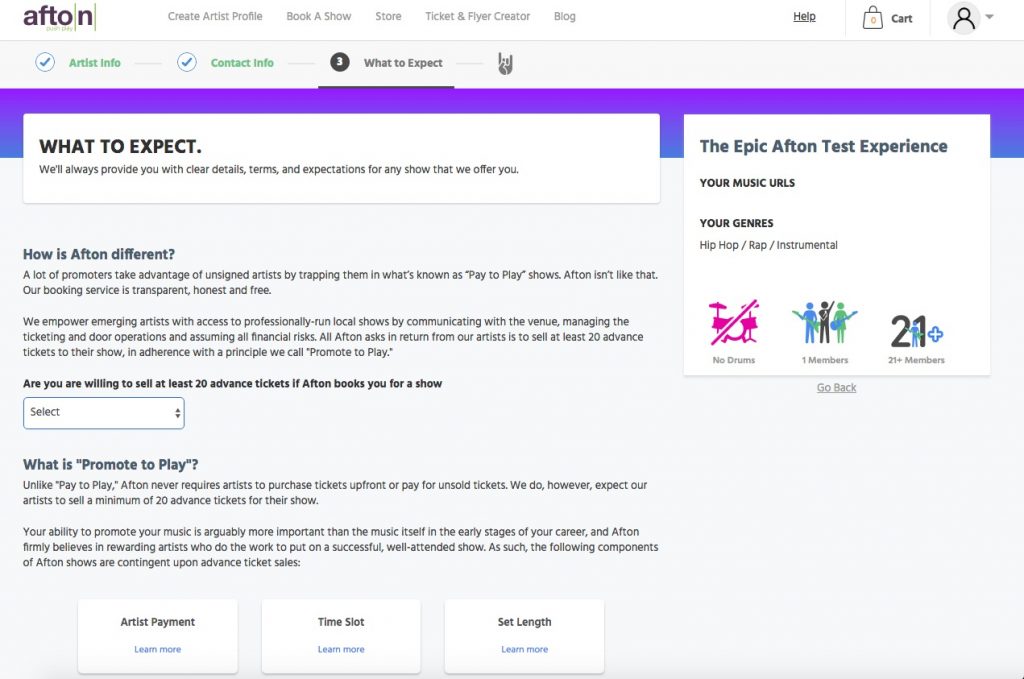
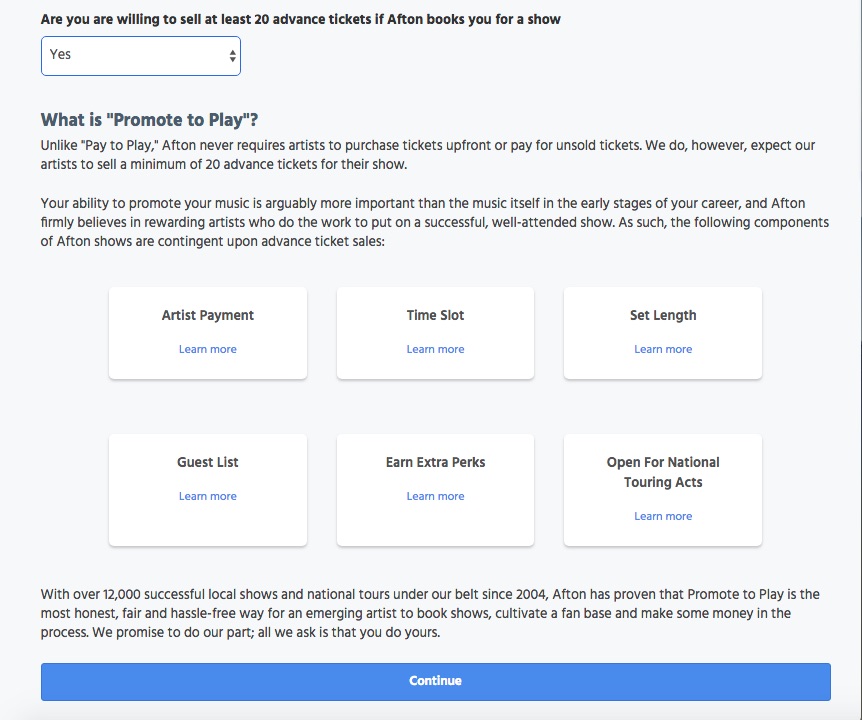
Step 8 (cont’d): Scroll down and you will see the six most important aspects of Afton Shows. You can click “Learn more” on any of the categories for more information. Once you have read through these categories, click “Continue” to complete you MyAfton account.
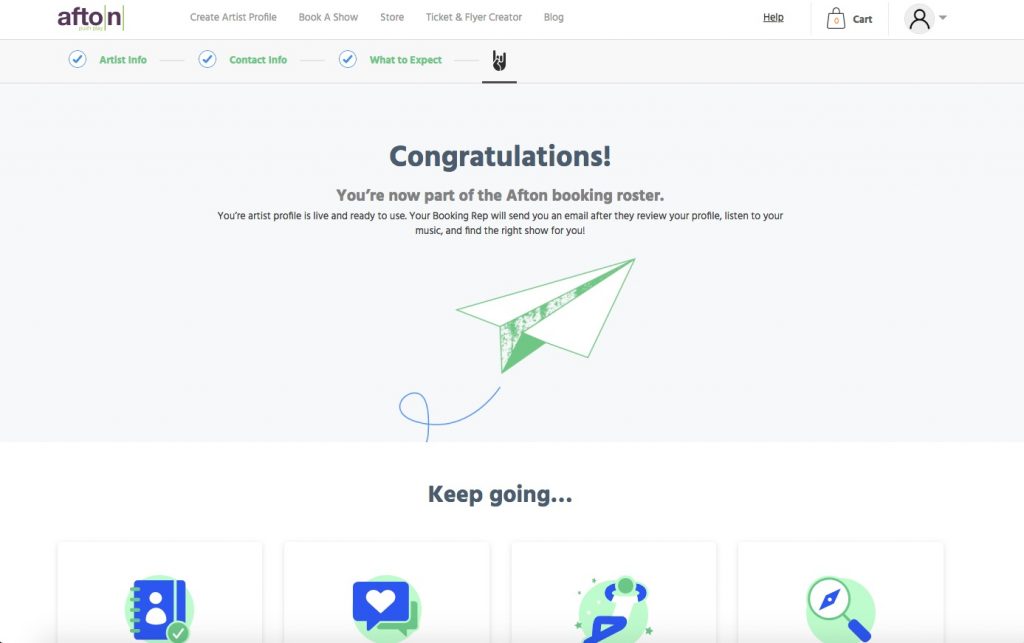
Step 9: Congratulations! You’ve finished setting up your MyAfton account.
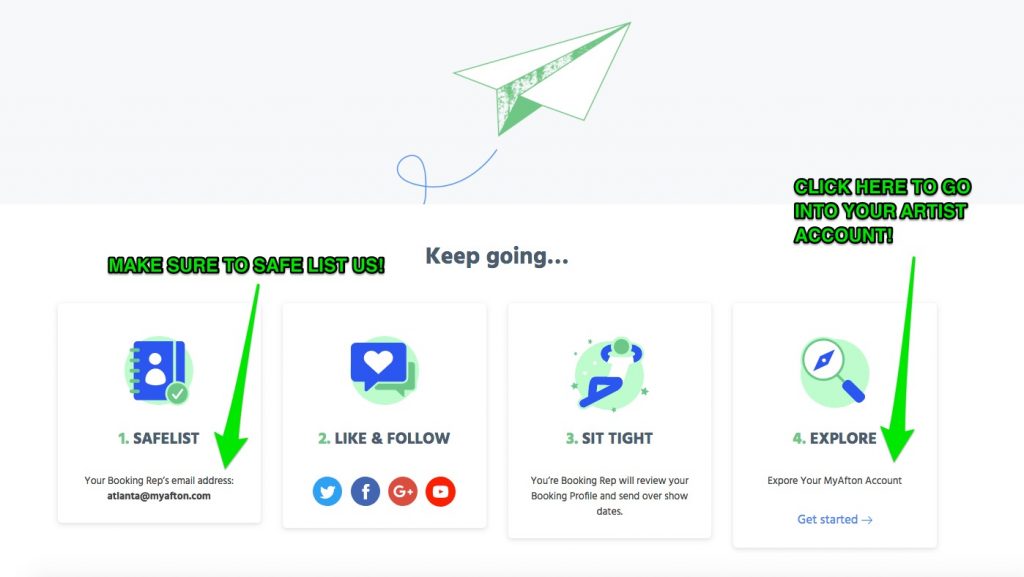
Step 9 (cont’d): Make sure to add your booking rep to your email safe list and click “Get started” to go to your new MyAfton account!
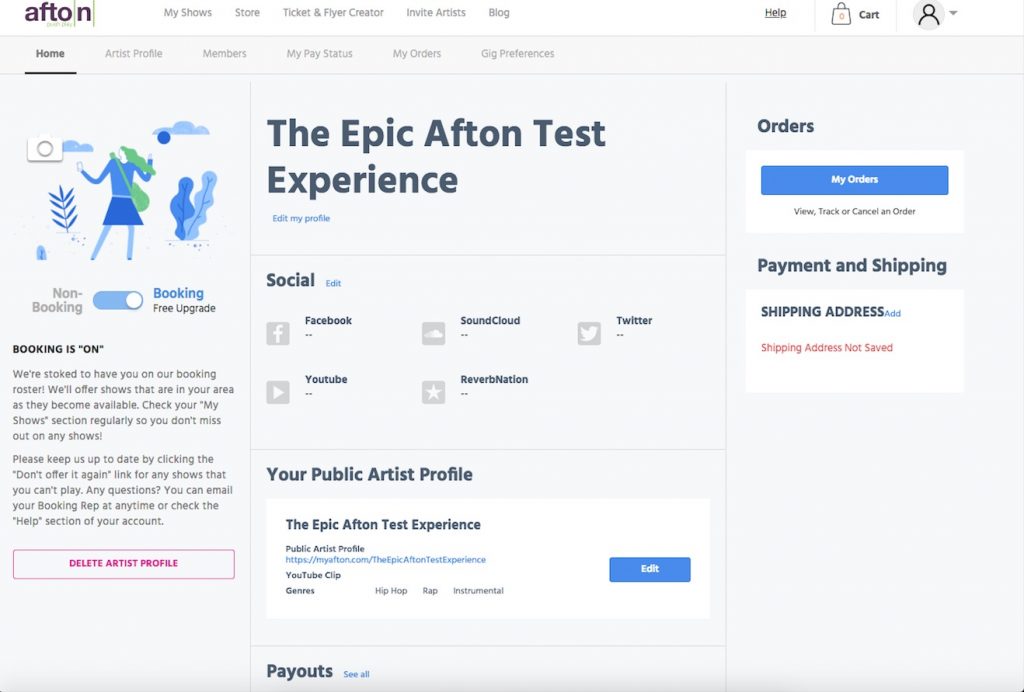
Step 10: Here you will find your MyAfton account. We encourage you to familiarize yourself with all the various aspects of the page as you build and add to it. Click all the navigation items and discover all the parts of your account that you haven’t used yet.
Categories
- Artist Payment
- Artist: LiveStream Setup Help
- Fan: LiveStream Setup Help
- General Show Terms & Details
- How Afton Promotes
- How To Sign Up For An Afton Account
- How to Use Promo Codes
- MyAfton Design Tool
- MyAfton Platform: Account Help
- Not Getting Our Emails?
- Open Dates & Days of Week
- Perks
- Refund Policy
- Ticket Questions
- Time Slot Policy & Set Lengths
- Turning Booking On/Off
- Weekly Check Ins
- Weekly Goals for Confirmed Bands

